I love the advent calendars I’ve seen on the internet and in the shops that have pockets or drawers that you can fill with your own choice of objects, or even activities. This year I decided to make my own for Big Boo and Little Boo to enjoy for (hopefully!) years to come. It took me about 3 evenings to finish, and could be made faster, but I am a bit lazy and like to have lots of coffee / chat breaks between my sewing! Here’s a tutorial of how to make one of your own.
Materials:
3 different fabric patterns 30 cm each
1m iron on bondaweb or similar to stiffen fabric slightly
1 1/2 m of 3 different ribbons to complement your fabrics
Red ribbon for loops
Stocking template
For the number tags:
24 brown mail tags
Sticky numbers
Thin ribbon for decoration (or what takes your fancy)
Instructions:
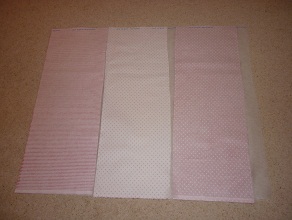
First you need to iron on your bondaweb to the back of your fabrics. I placed all 3 fabrics on the uncut bondaweb and ironed it all on to the one piece (see picture).
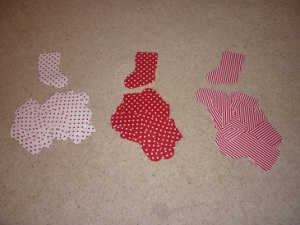
Copy the stocking template onto a piece of card. On each piece of fabric draw around the stocking 8 times, then flip the template over and draw around it 8 more times, so you have 16 stockings on each fabric pattern (8 fronts and 8 backs).
Cut out each stocking. Now you need the iron. Fold the top of each stocking over about 1/4 inch and iron down. You don’t need to be exact, it is just so there is no raw edge at the top of your finished stocking.
Take your ribbon and cut two pieces slightly longer than the width of your stocking pieces at the top. Now gather a stocking front and back and 2 ribbon pieces, ready to assemble your first stocking!
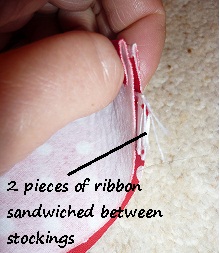
Place 1 stocking face up and lay a ribbon on it face up. Next take another piece of ribbon and lay it FACE DOWN on the first ribbon piece. Finally take the second stocking and lay that face down, to make a stocking sandwich. Pin around as in photo. Take some red ribbon and tuck it under your ironed fold front and back on the heel side of your stocking. Pin in place. If you do this now you only have to sew one row of stitches on your machine (that’s what I like, nice and lazy!).
Stitch around the edge of your stocking, leaving the top open. If you do a little backstitch at the start and end of your sewing it will be more secure. Turn your stocking the right side out, making sure to have a piece of ribbon on each side of the stocking. Now iron your stocking nice and flat (this might seem like a pain, but it definitely makes your stocking look more professional).
Your stocking is made! 23 more to go… Seriously they are really quick once you get making them in batches.
To make the number tags is really easy. Simply cut the end off your tag to make it smaller (I cut about 1/3 off). Use a little glue to stick a thin strip of ribbon on that complements all of your fabrics. Now just slip the tag over your hanging ribbon and you are done. Now to fill them and hang them… I am putting a little chocolate and a family activity to do each day (such as ‘Make a snow globe‘, ‘decorate the tree‘, ‘write a letter to Father Christmas’‘) in mine. Don’t they look much more exciting that your normal calendar?


