A Grrrrroovy Tiger Shirt

20140721-203020-73820478.jpg

I love this shirt, I think it’s brilliant. I think it looks cool, retro, funky, funny, different, smart…. but I can’t take any credit for it. I have to start this post by saying this is a total rip off of a shirt made by the very clever sewer and blogger at madebymamasha. She is also one of the brains behind the fantastic pattern shop Zonen09.

I haven’t sewn for my son for a while, and wanted to make him something he would choose to wear. He doesn’t normally wear shirts as he finds buttons fiddly, but said he would try one with snaps, and when he spotted this great ed emberley fabric he was hooked on the idea. I would have loved to use a true Zonen09 pattern for this, but their digital patterns are not yet available in English, so I used the Sis Boom Ethan shirt pattern I bought in a group purchase. It worked really well. I chose a size smaller than usual to get a slimmer fit, squared off the bottom and added extra interfacing for the snaps.

Just look at my first real go at pattern matching on the pocket- can you spot it? Not perfect, but I am chuffed.

20140721-205737-75457331.jpg

This was my first shirt and with clear instructions was easier than I thought. The cuffs look professional, the topstitching gives it a professional finish, and it has passed the store bought test with friends.

I’m not sure how many shirts I will make, but I did enjoy this sewing and, though all my husband said when he first saw this was ” Now he just needs a moustache and some 70’s sunglasses”, he did ask if I was ever going to make him something.

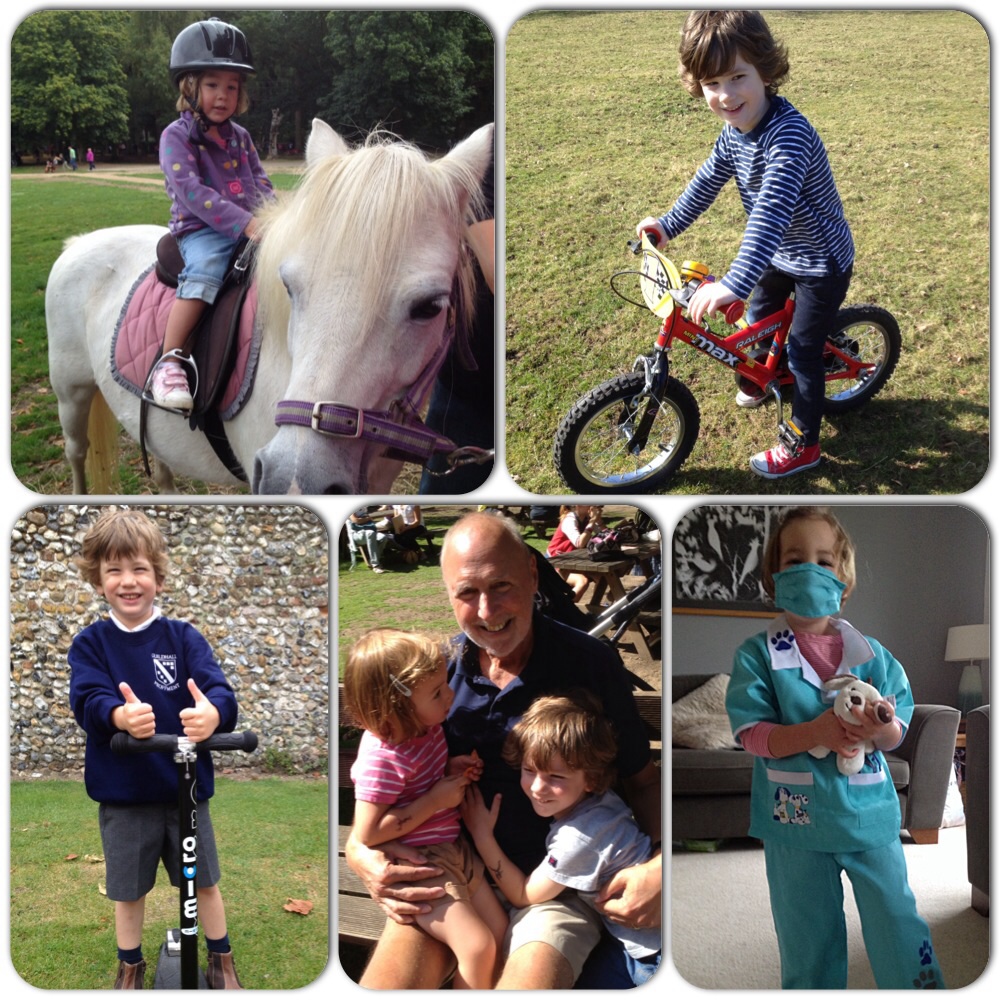
Here is my boy striking a pose when asked – he hasn’t quite got the cool camera style down yet…

20140721-205923-75563165.jpg

And our very own tiger getting in on the act!

20140721-210018-75618589.jpg

This post comes just in time for Kids Clothes Week- I did make it before, but only a few days so I am counting it… and I am just finishing my next little sew. Hopefully I will have some pictures to share soon.

Independence Day Geranium

20140704-203918-74358848.jpg
Happy 4th July! Today has been hot and sunny and our little UK town has been celebrating Independence Day with fairs, festivities and picnics. We live fairly near to some large US air bases so there is a high percentage of American children at School and pre school here.
America week has been running since Monday and Big Boo has come home with flags, Native American bracelets and head dresses, an American cent (“Now we can go to America one day Mummy- I have the money!”), and hot dog picnics.

20140704-204025-74425530.jpg
I had already bought this fabric with plans of a jersey Geranium dress, and it turned out to be perfect for Boo to wear (along with her red and white striped underwear!) for her pre school celebrations.

20140704-204149-74509205.jpg
I altered the sewing a bit and stitched the head hole first to give a nice finish, then pressed the arm holes in place to sew them up after turning the bodice the right way (I did line the bodice, and it gives the dress a bit more stability). These photos are second day of wearing and I should have ironed the turned up hem and the sleeves, but they do look quite smart when pressed- I promise!

Boo started off happy to be photographed but got fed up quite soon as you can see here!

20140704-204246-74566507.jpg
I hope those of you celebrating today have a great time!

Liberty zoo print Geranium

20140608-215419.jpg

Here comes the sun, here comes the sun and we say… “It’s alright”.

At last the summer has arrived here in the uk, a good excuse for a new Geranium dress for Boo. Back in April I went for a day trip to London with my mother (my first visit since having children!) and we kicked off the day with a visit to Liberty. If you have never been the beautiful building alone is worth taking the time to see, but if you are interested in fabric it is definitely one of those places on your tick list to visit. Liberty floral prints are so instantly recognisable, beautiful and timeless, that I was drawn to them. However, when I spotted this animal print I wanted it immediately. It has that beautiful softness of liberty lawn, perfect for a hot sunny day with a light breeze to catch it.

20140608-220204.jpg

I immediately new I wanted to make one of Rae’s Geranium dresses using it, and I haven’t been disappointed. I made my favourite style- cap sleeves, button back, and as usual simply cut one length of fabric for the skirt and placed the seam at the centre back.

This has already been worn a few times, with leggings on a cooler day…

20140608-220509.jpg

… And today on our country walk looking for damsel flies. I have to add this picture of Big and Little Boo walking hand in hand marching ahead to be the first to spot them. A moment of sibling camaraderie captured forever- or blackmail for my son who ‘does not hold hands with girls’! Oh the things we get carried away with in the sunshine.

20140608-220911.jpg

I hope you have been enjoying the sun wherever you are.
Watch this space for yet another geranium (think I am becoming slightly obsessed).

Willow and co. Ash Pants

20140509-211056.jpg

Have you seen the new willow and co. patterns yet? The look book is full of inspiration and obviously appealed to me as I have succumbed to this pattern while it is still very new – something unusual for me.
.

20140509-213134.jpg

These pants come as part of a jumpsuit pattern, so you also get a top pattern, full suit and these trousers- 3 pieces of clothing all rolled into one! I chose the trousers to make in the knowledge that my daughter most likely would refuse to wear the top as it is a bit frilly around the neck with the ruffles. Also, I like the trousers best- so it’s win win.

20140509-213229.jpg

The pattern was really easy to follow and sew up. I did french seam the front and back centre seams for added strength and top stitched them down so they didn’t rub at all. I even went for the ruffle effect on the waistband (which I thought may be too much, but is actually quite sweet). The pockets were a plus for Boo, though she did comment that she would like them bigger, and next time I think I would use the largest pattern size rather than middle, as she can only just get her hands in them.

As soon as Boo put these on she said “These feel like pyjamas Mummy.” This could be a compliment as they are so comfy, or may mean they end up being worn in bed. I don’t mind if they do as they were so quick to make. I do think I’ll make another pair in chambray which may look a little more like day wear, and I expect they will be worn lots as they are so comfy.

20140509-213347.jpg

Sadly our British weather seems to be hanging on to April showers even though we are well into May, so these photos were taken on a blustery afternoon and are the best of the bunch- taken in 2 minutes flat. Take a look at the funk fly-away hair below!

20140509-213441.jpg

If you need a simple trouser pattern, that could be also used to make summer shorts and pyjamas, then I’d definitely recommend these. Watch this space for more examples..

She’s Back! … With a Funky Pigeon Pinafore.

image

Wow! Am I really here? Is this the right place? I can’t believe that I am posting again after such a long, long time! It has been over six months since my last post and I had nearly given up on blogging, just because life (as it does) seems to have taken over and my sewing and making mojo seemed to have disappeared. But recently I’ve been taking tentative steps back into the world of crafts, and I’m feeling hopeful that the signs of spring outside will help me to restore my enthusiasm and creativity. I’d apologise for my absence, but expect it is of little consequence to you, I’m just glad if you are here, giving me another chance (or, in fact, if you are here for the first time).
image
The last few months have been a roller coaster for me, with my eldest starting school, adjusting to life with one at home most of the time, birthdays to plan and, more notably, the last few months with, and passing away of my wonderful daddy. I’m not going to dwell on things here and I’m not making excuses, just explaining.
Anyway, I’m going to jump in with a new dress I made a few weeks ago for Little Boo – the funky pigeon pinafore.
image
If you have had a browse here at all you’ll know about my love for the geranium dress (thank you Made by Rae!). However I have decided to create a new silhouette for my recently 3 year old, especially now that she is slimming down and growing up. I will definitely return to the geranium, but it’s fun to mix in a new style. This dress was actually based on the bodice from the geranium, but you could use any bodice pattern you have to hand.

I simply drew around the bodice pattern, then extended down at a slight A-line, basing the length of the skirt on a current dress. Simple! I do like simple.
image
The overlap at the back extends down the length of the dress, making a nice detail. I managed to find some buttons that match this fabric perfectly, and used contrasting thread to sew them on. I used a contrast button at the top too as a feature.
This could be made just as easily with poppers down the back, or a zip, but it is great practice for sewing button holes!
image
I made this dress with no sleeves, which is perfect for spring as it can be layered with a top underneath, and a cardi on top. Come summer it will work fine on it’s own.
You could even make this dress fully reversible if you wanted to… Using the bodice and adding a lining cut exactly the same means all seams are covered, and buttons can be used on each side. I simply kept a plain lining as I always end up preferring one side of a reversible item.
There we go, short, sweet, simple. My first new (returning!) post. I hope to be back again soon (much sooner)!

Blanket fit for a horse!

ImageWe interrupt this sewing with an important news flash – a horse has been spotted in the Suffolk area with neither blanket nor eye mask to protect him from the sunshine in the current balmy weather. Cue Super Sewing Mummy – to the rescue!

Poor Maximus! If any of you have little girls and know the film Tangled (Disney’s take on Rapunzel) you may recognise this fine beast, if you can manage to spot him under his disguise!

ImageLittle Boo helped me (watched me) measure up Maximus, cut the curve around his neckline, attach the fluffy fleecy lining and add Velcro straps.  She did manage to poke out the corners once the blanket was turned.

ImageAnd once it was carefully placed on his back did she squeal in delight? Yes… but this was quickly followed with an impatient “Cover his eyes, Mummy!”.

Cue a tiny eye mask, fastened with elastic. Now look at that stallion – doesn’t he look fine!?

ImageBoo had to put on her matching skirt and get Maximus ready for a walk in the pushchair to get him to have a sleep in all his new cosy gear. Worked a treat for her too… which left me with a little quiet time to work on my real sewing project in preparation for Autumn.  I’ll be posting soon.  Yee-ha!

Image

Oliver and S Ice Cream tunic.

image
I took the plunge and finally bought this fabulous ice cream dress pattern from Oliver and S. I have been coveting it for a while, and finally succumbed after seeing Gail’s lovely new briar rose version (see it here)- I don’t think this lady ever creates something that is less than perfect. This time I think my version is pretty good too – having a great pattern to follow does help rather a lot!

image

If you haven’t tried any Oliver and S patterns yet, I really do recommend them, they are easy to follow with helpful hints and tips.  The only change I made was to use some elastic for the button loop rather than matching fabric. After my last creation for Big Boo (the cargo shorts on the previous post which I made in age 4 and he can only just squeeze into), I decided to err on the side of caution and made a size 4 for my big 2 1/2 year old. You can see there is plenty of room to feel the breeze and, when (not if!) I make my next,I may try a size 3. That said I think she can just about get away with this now, and she’s quite happy to put it on (always a bonus!).

image

No scooter test run yet, but this top sure is great for flying a kite, and we have had some perfect summery breezes for that recently – what a great way to spend the summer holidays!

image

And just to leave you with a final photo, I couldn’t resist this opportunity when we stopped off for some yummy Cornish whippy ice cream at the local shop today. Not the best photo ever but a perfect match for her ice cream tunic, don’t you think?

image

Blank Slate Dinosaur Coastal Cargo Shorts

Image

Finally, some clothing for my son! Why do clothes for girls always seem so much more fun to make? I think they are certainly easier anyway.  This was my first foray into welt pockets and a real life functional zip so I am mighty pleased that I have managed to produce a working pair of trousers.

Image

Big Boo was happy to put on his brand new mummy made shorts (I don’t think they will be worn rolled down much) for a couple of reasons:

1- They have black on them, his favourite colour.

2- They have….dinosaurs in the pocket!

Image

I’m one of those mean mums that doesn’t let many image adorned items of clothing into my children’s wardrobes, so this was a big deal.  It was made even better as the giganotosaurus (big dino) kept biting Daddy’s finger when he put it in the pocket….”Do it again Daddy!”

To be honest as I was making these I was almost cursing my decision to buy the pattern as I had to unpick and adjust the zip again, but I think this was my inexperience rather than problems with instructions. And when I finally finished, I was actually pretty chuffed with the results (even if the zip is a bit duff).  They have passed for shop bought, and passed the scoot test (seems to be becoming the norm clothes test for my children).

Image

The only major issues I have is… they only just fit! I made size 4 based on my slim Jim normally fitting this size, but I’m just thankful that Little Boo likes dinosaurs too, as I think these may be modelled by a girl near here in the not too distant future.

Image

“These dino pants make me want to ROAR!” (And sport funky 70’s hair!)

If you fancy making your own funky boy ‘Coastal Cargos’ find the pattern for sale here.

PS: sorry for blurry pictures, I promise to do better next time. 😦

Geranium flipped!

image

My daughter is a fan of moo cows (yes, and horses too, but they are a little bit more predictable) so when I spotted this fabric I just had to grab some. However once it had popped through my letterbox and was spread out on my kitchen table I had no idea what to do with it – make a bag, use it to quilt… or clothing.  So it sat in my fabric draw for a few months, and every time I reached for some fabric for a new project, this fabric would virtually moo away at me, desperate to be used.  I finally decided what to make when a number of blogs all caught my eye at the same time and I had a ‘flash of inspiration’ type moment (which is unusual for me, I usually mull things over a while before making a decision).  The first was the fab flip pattern series from frances suzanne, and the second was this lovely summer dress I spotted over at Caila Made.  Teamed with my love of the Geranium pattern from Rae I decided to mix the two dresses up and create a cow Geranium with deep pockets in plain black to tone down those crazy cows.  It came together really easily, as I just needed to add in the pocket panels to the width of the skirt.

And my daughter’s initial thoughts…. “Moo cows mama! NO, DON’T WANT TO WEAR IT!”. So this dress did seem as though it was consigned to the cupboard, for the poor cows to be slowly moth eaten, the pockets to fill with dust…until today!

Whilst Little Boo watched tv unaware, I manged to gently ease it over her head and get the poppers done up without her even noticing- result! When she finally realised she simply looked down and said “look, moo cows mummy”, then went back to the tv.

So I finally have some photos to share with you. A few little treats helped her to discover the pockets….

image

“Look mama, sweeties!”

and finally she was smiling in the sunshine, in cows (well, kind of smiling).

image

Even Big Boo commented when he came out of pre school, whether it was, the dress, the weather, or the ice cream that put him ith such a great mood he bestowed this hug on his sister I do not know…

imagebut now it has had it’s first outing I hope it will see many many more.

Easy as ABC Maxi (plus tutorial link)!

I decided to take the plunge and have a go at sewing with jersey…. and I love the outcome! After a good look around on favourite blogs and searching through google, I took a few ideas I had collected and created my own method for making this skirt.  I just couldn’t see why I would need to create a separate waistband of exactly the same width, so I haven’t!  I’m really pleased with the result and have even had a few comments from people I don’t know so I guess it doesn’t look too homemade.

image

These skirts are fab because they can be dressed up or down, casual with a t-shirt or smarter with a necklace and jacket.

The waistband (with this fabric at least) doesn’t add too much thickness around this area (no one wants that…) either.

image

If you fancy making one, click here for a tutorial or on the tutorial picture.  Though some of the explanation seems a bit lengthy, it really is simple.  You just cut two pieces of fabric and sew them up the side.  How easy?  I dare you to make this faster than you can say “wow! What an easy peasy maxi” and see how many compliments you can clock up.

If you like this skirt why not take a look at:
imageimageimage

Salme playsuit, a review.

image

I finally finished my Salme play suit, just in time for the sunshine. I can’t believe that I have seen people walking around in jeans and jumpers in 27 degrees today (I know this is arctic in comparison with some places in America at the moment). I plucked up the courage to wear this into town and it was just right in the heat.

This project wasn’t the most straight forward and if I make it again there will be a few changes, not least my fabric choice. I think this may look great in a chic black crepe fabric, but this thin batik style cotton makes me feel a bit like I should be walking out of an indie shop in 1995 having just brought some incense sticks (did you go through that phase too?).

I made this in a size 10, and although the shorts are ok, the top was way too big and gaping. I ended up trimming a full 2 inches at the shoulders after I had finished and still it is a little on the large size. I am normally between an 8 and 10, but think this was fairly generous.

I also think that the snap fastener suggestion hasn’t worked too well (even though I love snaps, so much quicker than button holes in my opinion!). Because the fabric is quite light I started by using hand sewn fasteners, but was worried they would tear the fabric when pulled apart. I therefore took them all off, added interfacing to the lining of each edge, and used proper snap fasteners (the ones you use a little holder that I bang with a hammer- sorry not v technical). The result is more sturdy closure, but because they are not attached on the outer side of the fabric it doesn’t lay very flat. Another time I would go through both layers of fabric so that the fasteners are visible, but more sturdy.
image

I was able to follow the instructions, though they were much less detailed than previous PDF patterns I have brought (I have been spoilt by Rae’s great photo tutorials) and they were quite sparse in places. Luckily my material was double sided so I didn’t have to worry about wrong sides etc for the pocket construction.

I also added turn ups to the shorts, which worked as my material is double sided.

I think this suit will be fine for playing with the children, and better at the park sandpit than a skirt (no knicker showing concerns), but I still don’t feel 100% confident wearing it.

image
I think it could look great in a more classy fabric, but I wonder whether it would look more finished with some type of collar added.

I have to say I am much more excited by the project I finished just after this, my very first maxi, and it only took me 15 minutes! I’ll blog about it tomorrow hopefully, and try and add a simple tutorial as I made it up myself.  Off for some beauty sleep before we hit the beach tomorrow.

A flop to a top.

image

I recently purchased a couple of lovely sewing books by Yoshiko Tsukiori, one of which is the Girl’s Style Book.  The book itself is beautifully presented with lovely clear and simple photos, and some of the patterns really caught my eye.

image

I decided to start with what appeared to be a relatively easy garment, a sleeveless shirt with a round neck (no collar). The plain white linen example in the book looks gorgeous however, having none of that to hand, I settled on this fabric from my stash.  I think I had the idea that the flying cranes would lend a Japanese feel to the top.  I decided to make the shirt in a larger size for Little Boo, but not add any seam allowance (which is NOT printed on the pattern) so it wasn’t too big. Maybe this is where I went wrong.  I don’t think this should affect the actual working of the top and have been successful using this method before, but for whatever reason I came to a BIG problem part way thought the sewing.  I expect you could have some idea what this problem was by now, if you look at the finished top, and know that it is meant to be a shirt!

image

I sewed the plackets for the top as small as I could, already thinking there may be an issue, but when I tried lining up the side seams for sewing, it was clear that the front of the shirt was no where close to touching, let alone overlapping for button closure… Back to the drawing board!

Rather than scrapping the project I added a length of fabric to the front of the top to enclose it and added an ‘easy peasy button closure to the back (look on craftiness is not optional for a a tutorial). I toyed with adding buttons for a fake shirt effect, but decided to save them for another project.

Though this isn’t in my list of favourite projects, I am glad that I have ended up with something wearable as I love the fabric.  I’d love to hear from anyone else who has made this top to find out if theirs was a success.
Just to finish, a few extra pictures of my so compliant model!
image

Open your eyes, Boo!

A new summer skirt…. for me!

image

Hooray! Finally I am starting to enjoy sewing for myself now that I am managing to produce some successful items that I actually want to wear.  I started cutting the fabric for this skirt last weekend and it has taken nearly a week to complete, only because it has been done in dribs and drabs when children were occupied / asleep. I mostly followed the tutorial here , and just tweaked it a little.

Originally I planned it to be a little longer so it hit my knee (and covered my tubby bits that I can’t seem to shift!) buy then I bit the bullet and chopped it shorter in the hope of making it look a bit more modern.

image

It’s lined with muslin, which was cheap at the shop, but I would probably use poly cotton another time as it is much easier to work with.

I love the pockets. They are lined with a pale blue and white butterfly print I had left over in my stash, and I like looking down and seeing a little contrast, just for me to see.  They were definitely worth the extra effort and have already been used lots.

image

Last night I was browsing some of my usual blog sites and founds this fab skirt week competition on crafterhours, so I posted this skirt, my boho maxi skirt, and Little Boo’s spotty elastic skirt. If you hop over there you will find lots of fab skirts along with some tutorials, and you can vote for your favourite skirt to win a prize. There are lots of way more skilled sewers that have entered, but I’m glad just to join in and put my pictures ‘out there’.

crafterhours

Anyway, for my next selfish sew (hey, that sounds like a good title for a regular  blog spot – maybe I should start one and use it to help me expand my own wardrobe?) I am planning on this play suit by salme. Just off to print out the pattern….

Lined elastic waist girl’s skirt, in the sunshine!

A while ago I posted about a lined skirt I made for Little Boo in the lovely Timber and Leaf deer print. When I finished it the weather was just too cold to wear it really, but now…. Hooray we have sun!

imageNow I have made another using the same method in a simple spot fabric, this time a little longer (she is growing too fast!) and I took a few photos as I made to share with you just how simple it is to make.

imageimage

A
A
A
A
A
A
A
A
A

a

If you fancy making one of these just click here or on the photo below for a sweet and simple tutorial.
image

And just to share with you, Little Boo loves new taste sensations (she is one of those children that will chew on a lemon, eat the apple core and all, and delight in the zing of chilli crisps), but bubble mixture … really?
image

“Mmm, what is this fine delicacy? I sense undertones of flowers, lemon and washing up liquid.”

Oliver and S Sailboat Pants

image

At last have made some of these lovely Oliver and S sailboat pants. I have been coveting these ever since I saw this lovely elephant version made by Gail on the probablyactually website (if you haven’t visited before, you should go and take a look – it is fantastic!). I made these in Essex linen and used the size 4 pattern. Little Boo is only just 2, so they look a bit more like short trousers than Capri length, but they are great for when the weather is trying to be good but not quite managing it (we seem to be having quite a lot of that at the moment).

I love the button detailing on the front, nicely modelled here by a very compliant model:

image

“Boo, where is your tummy button?”

However, I am a bit lazy, so next time I make these (which I am sure I will) I may cheat and just sew the buttons on without buttonholes as the elastic in the back means they are not necessary. I may also try a bit of contrast fabric on the sides, or even some piping. I’m desperate to try piping, but can’t find any to buy, so may have to follow a tutorial to create my own, we’ll see.

Of course these have also been tested for scooter suitability and passed the test…

image… and have lots of room for bending. They also have a cute side split in the leg, which you can catch a glimpse of here.

image

I definitely plan to use this pattern again, maybe with some more funky fabric, so watch this space…

Geranium cat and mouse dress

image

At last some pictures of my cat and mouse geranium dress actually being worn!

image

When my husband walked in from work this evening he claimed he had never seen it before, so I don’t think I have put Little Boo in it many times since I made it. I originally thought it may be a bit more of a party dress, but today I have had so many lovely comments about it that I think it will be coming out a lot more often, plus Boo was quite happy to put it on, and it has the stamp of approval as a full on play dress – great for scooting…..

image

and romping with dinosaurs!

image

This is a bit of an indulgent blog showing off my little girl and a dress pattern I absolutely love but, hey, it’s my blog and I’ll show off if I want to! Better get on with some new sewing…

PS: Click here for more about the dress and a tutorial link at Made By Rae.

Old Jeans To Boho Skirt

image

Another sew for myself, how nice! I spotted something like this on Pinterest and just guessed my way to making it.  The sudden warm weather motivated me to finish it and I wore it to the park today, feeling pretty darn boho.

This is pretty quick to sew and (I think!) is easy to wear teamed with a vest top and sandals. It was good for playing at the park as everything was well covered when bending down to dig sandcastles and crossing legs to eat picnics!

image

If you would like to try making one I have put together a tutorial here. I know I need to get better at taking mid make photos, but hope you can follow it! Have fun.

A Bucket Hat Sewn for Boo

We’re off to a slow start in my house. I have been ill the last couple of days (don’t you just love a jippy tum?) so haven’t been able to make the start I wanted on my KCW challenge. Nap times have been spent in slumber myself and 8.00 bed times aren’t conducive to much sewing. That said I have almost finished my first project. This is my first ever hat and it is by the lovely Oliver and S (you can get the pattern for free on their website!).

image

It hasn’t got the inside ‘bucket’ section attached yet (which will make it reversible) and then it will get a top stitch around the bucket rim near the brim, which will make it look much smarter. One side is a denim chambray and the other navy with a white spot (you can just spot it – ha – if you look carefully). Despite that Little Boo was happy (phew!) to wear it today as the weather has suddenly turned sunny.
I might have a change of plan on my next project now – Big Boo’s immediate comment was ‘Have you made my hat yet mummy? Does it have dinosaurs on it?”. Here we go again….

Pimp my pushchair

image I can’t help it, I just don’t like pink.  Never really have.  Now my daughter does like it (though not in a crazy way, but she is definitely more of a girl than I ever was). I also don’t really do dolls and all the paraphernalia that goes with them, but Little Boo does.  She likes to feed them, change their clothes, take them for walks … so when she got a pushchair she was really happy to have some thing to push around while Big Boo raced off on his scooter.  I, on the other hand – not so keen on the day glo pink.  What’s a mum to do? Bring out her sewing machine of course. Little Boo also loves horses (notice any stereotypes coming out here?!) therefore a compromise was found in the way of this gorgeous Michael Miller fabric. I opened up this tutorial, then added my own tweaks, making it reversible with a grey paisley print on the back (will add photo soon) sewing in elastic at the top as I joined the two fabrics, and using bias tape with interfacing for the straps. And I am quite pleased wiith the end results. Boo is too: image Of course a bag was required to carry baby’s bottles, cups, toys, etc.

image

There really wasn’t much wrong with the old pushchair, this is just my whim, and now  I can feel cool at the park again.

A Spring Top for Me

image

Something sewn for myself? Wow! That doesn’t happen very often.  To be honest I get more of a kick out of making something for someone else, particularly children because things always look good on them.  But when I spotted the spring top sew along over at Made By Rae I decided this was my opportunity to make something in an adult size, and here it is.

image

My elephant top (hope I don’t look like an elephant in it!). You might recognise the material from my wide mouth pouch post. I know it’s rather a young (!) fabric, but I wanted a fun top to throw on with jeans, and this works really well with my red converse, which link up with the red binding.

image

I took inspiration from a top I already owned and created my own pattern by tracing around it. It has French seams and big bright red zip which really stands out against the navy.  The original was made out of lighter material, and I my version looks a bit more boxy, but I think it works ok.  I need to find a UK seller with a good range of silky or voile fabrics, if anyone wants to recommend one.  Maybe then I’ll try this pattern out again.

You can find a whole host of spring tops made by like minded sewers on the spring top sew along flickr pool here.  Happy browsing!

KCW What to sew?

Following my premature Geranium dress (see my previous post) I have been back to the drawing board and searching my Pinterest boards and others for inspiration for the KCW (Kids Clothes Week) challenge.  KWC is a great initiative set up by Elsie Marley running from 22nd April (next week!) where you sew for an hour each day to produce clothing for children.   This is the first of these sort of challenges I have joined and I am really excited if a little nervous as the standards seem to be very high.

So, my ideas so far are fairly varied and may well change, but I’ll share them with you.  I won’t get time to make all of these so some feedback would be greatly appreciated as to what you think would make good challenge pieces:

image This is actually a Jonnie Boden dress for older children and teens, but I like the simpleness of it (and the added bonus is that if it works well I could easily sew a grown up version for myself!). It’s about time I tried a new dress style so this is quite a likely contender I think.

Aaaa

Aaaa


Aa

Aaa

image Next up is this bucket hat by Oliver and S. You can get the pattern for free here, but the bonus is I have this in a book so would have the pattern ready to go. Also this could be made for my daughter AND son (who I sew clothes for rarely).

Aaa

Aaa

image I have only tried appliqué once before, and I’m one of those terrible mums that rarely let’s their child wear t-shirts with pictures on the front. However Big Boo is SO into dinosaurs at the moment this might make a great clothing gift for his birthday. Quite an undertaking for me, and new techniques too… Find this template here, but I would probably make my own.

Aaa

I’m also thinking of some shorts but have too many to choose from to put here. What do you think? You can see I am dreaming of the warmer weather.  It will come soon … wont it?
If you want to join in too click on the link below, then let me know, I’d love to follow your progress!

Birds, Cats, and a New Geranium

Oops, I’ve done something I didn’t mean to. We’ve had a busy few days making the most of the slightly warmer weather and the last few days of the Easter holidays.  On Saturday we visited a Bird Of Prey centre for my nephew’s birthday.  I’m not sure what I think of this sort of place, the tethered birds look so restricted and the cages too small, but I know they can be important for endangered species.  Anyway, Big and Little Boo loved it and got to hold a barn owl on their arm (well Daddy held the barn owl next to Little Boo) and were very excited about it.  I was amazed Big Boo had the confidence to do it. Here he is being very brave:

image

Later on that night when they were both in bed I made my mistake.  I went downstairs to my sewing machine, picked out the cat material I had earmarked for a geranium dress (my third, see my first and second here) for Little Boo, and started to cut and sew.  Oops.  That was my first challenge for kids clothes week.  Not sure what I am going to do now.  Oh well, at least I have this to look at whilst I try to find some inspiration (I’ll post some prettier pictures when Little Boo is in the mood)…

image

Dinosaur Messenger Bag – A Bag For A Boy

image

I always feel a little guilty when I present Little Boo with a new top or dress to wear (not that she takes the blind bit of notice, she would wear a sack happily) and when I was sewing gifts (like the horse drawstring bag and bike basket) for her second birthday, Big Boo did ask “when are you going to sew something for me mummy?”. I felt the guilt creep into me and decided to put the imbalance right.  This is what I came up with, and it has actually been more of a hit than I thought it would be – well anything with dinosaurs will get a smile from him so I new I had a good start.  This bag has actually been carted full of toys on two trips away already, and I have plans for this bag once we get the weather for regular park trips…

image

I actually made this up a few weeks ago, but have only just got around to posting it after reading about this bag on ticklespink earlier today. Big Boo was actually happy to pose for a photo shoot (don’t let the grumpy face fool you, and don’t you just love the unbrushed 70’s hair!).  I think he is starting to enjoy seeing himself in photos – egotistical little boy! The pattern came from merriment design and was super easy to follow with clear photos.  I might make one for Little Boo with horses on…..(sh don’t tell her brother).

Kid’s Clothes Week Spring 2013

I’m feeling quite excited and more than a little nervous at having signed up for my first sewing challenge. The idea is that you commit to sewing children’s clothing for an hour each day for a week, with a beautiful (hopefully!) article or two to admire by the end of the challenge. This is all new for me. I have followed other challenges before, including the recent Celebrate The Boy series over at Made By Rae, but have decided to take the plunge as I stumbled on kcwc the other day. I’ve got my fingers crossed that I manage to keep up with it, and hope I can be a bit flexible if needed, doing 2 hours on one day if necessary…

image
I have just brought this cat and mouse fabric which I thought might make a cool dress for Little Boo, but who knows.

image
My current project is this mark two Geranium Dress. Following my previous encounter with this pattern (click here to see) where I was bowled over by the end look, I thought I would create a different version of the dress with a notch in the neck and small sleeves. I have nearly finished it but have run out of snap fasteners (darn!) so am champing at the bit for the store to open so I can get some more.